There’s a certain exasperation that only a stubborn, outdated sticker clinging tenaciously to your car window can truly evoke. Whether it’s an old parking permit, a long-forgotten decal from a bygone era, or a dealer sticker that has simply overstayed its welcome, these adhesive antagonists often seem to defy all attempts at removal. Many drivers, faced with this seemingly insurmountable challenge, resort to aggressive scrubbing or, worse, abrasive tools. This inadvertently scratches delicate glass or damages costly window tints. But what if there was a method, a sophisticated approach honed by automotive detailing professionals, promising a clean, pristine finish without a single scratch or sticky residue?
Indeed, the era of battling unsightly adhesive remnants is definitively over. This isn’t merely about yanking and scraping; it’s an art, a science, transforming a persistent blemish into an invisible memory. By integrating insights from seasoned experts and applying surprisingly simple yet incredibly effective techniques, anyone can achieve a streak-free, crystal-clear window. This enhances both their vehicle’s aesthetics and resale value. Prepare to discover the transformative methods that will empower you to effortlessly liberate your car’s glass from even the most unyielding sticker, restoring its original clarity and brilliance.
| Category | Item/Method | Description & Application | Key Considerations |
|---|---|---|---|
| Heat Application | Hair Dryer or Heat Gun (low setting) | Gently warms the adhesive, softening its bond to the glass, making peeling easier. Apply heat evenly for 30-60 seconds. | Avoid excessive heat, especially on tinted windows, as it can cause bubbling or damage. Maintain distance. |
| Solvents & Lubricants | Rubbing Alcohol, Goo Gone, WD-40, Citrus-based Cleaners | Breaks down the chemical structure of the adhesive. Apply to a soft cloth, dab onto residue, let it soak, then wipe away. | Test on an inconspicuous area first, particularly with strong solvents, to ensure no adverse reaction with tints or surrounding paint. |
| Scraping Tools | Plastic Razor Blade, Old Credit Card, Microfiber Cloth | Used for carefully lifting edges or removing softened residue. Plastic blades are safer than metal on glass. | Always scrape at a very shallow angle (almost flat) and never use metal blades directly on glass to prevent scratches. |
| Cleaning & Finishing | Glass Cleaner, Clean Microfiber Cloths | Removes any remaining solvent residue, streaks, and ensures a pristine, polished finish after the sticker is gone. | Use a high-quality, ammonia-free glass cleaner, especially on tinted windows, for optimal clarity. |
For more detailed automotive care tips, consult resources like AutoGeek.net.
Mastering the Art of Adhesive Eradication
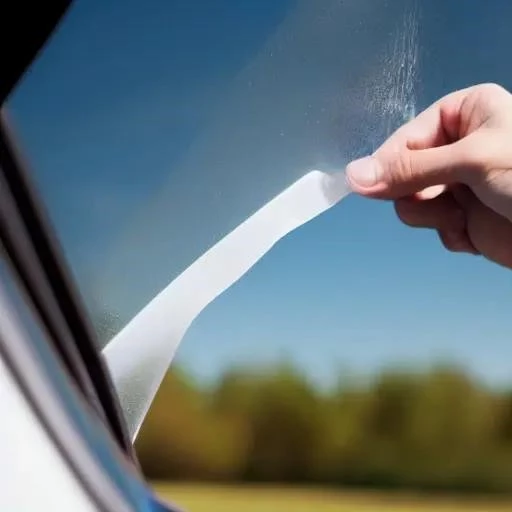
The journey to a flawless window commences with understanding the adhesive’s composition. Most contemporary stickers employ a pressure-sensitive adhesive, which responds remarkably well to specific treatments. Automotive experts consistently advocate for a two-pronged attack: heat and targeted solvents. Initiating the process with a gentle application of heat, perhaps from a standard hairdryer or a low-setting heat gun, meticulously softens the sticker’s grip. This crucial preparatory step, often overlooked, significantly reduces the likelihood of tearing the sticker into frustrating fragments. Once pliable, a plastic razor blade, carefully maneuvered at an almost flat angle against the glass, can begin the delicate task of lifting the sticker’s edge. This prevents any potential damage.
Even after the primary sticker has been successfully peeled, a tenacious, sticky residue frequently remains. This is a testament to its former adhesion. Specialized solvents truly shine here. Products like Goo Gone, WD-40, or even rubbing alcohol, when sparingly applied to a microfiber cloth and dabbed onto the residue, work diligently to break down its chemical bonds. Allowing the solvent a few moments to penetrate the gunk is absolutely vital. This transforms the sticky mess into an easily wiped-away film. For those navigating the complexities of tinted windows, exercising extreme caution is paramount. Always opt for ammonia-free cleaners and test any solvent on an inconspicuous area first, preserving the integrity of the tinting film and ensuring a truly professional outcome.
A Future of Unblemished Automotive Elegance
Beyond immediate removal, understanding preventative measures ensures enduring clarity for your vehicle’s glass. Future stickers, if truly essential, can be applied with a clear static cling film underneath. This provides an effortless removal pathway. Moreover, regular, meticulous cleaning of car windows not only enhances visibility but also maintains the glass’s pristine surface. This makes any future adhesive challenges significantly less daunting. Embracing these advanced yet accessible techniques transforms a once-dreaded chore into a straightforward aspect of comprehensive vehicle care, reflecting a forward-thinking approach to automotive aesthetics and longevity.
Ultimately, the quest to flawlessly remove a sticker from your car window is no longer a battle destined for frustration. Armed with the correct tools, a dash of patience, and these expert-approved methods, you are now empowered to restore your vehicle’s glass to its original, unblemished glory. Imagine the renewed sense of pride, the enhanced visibility, and the undeniable elegance of a car freed from unsightly adhesive remnants. This transformative knowledge not only solves an immediate problem but also elevates your understanding of meticulous automotive care, paving the way for a perpetually pristine and aesthetically pleasing ride. Step forward confidently, for a crystal-clear future awaits your car’s windows.